Plot 6 & 7, Prem Nagar Laulai, Chinhat, Lucknow,Uttar Pradesh - 226028 India

How to whitelist a domain in Microsoft 365
How to whitelist a domain in Microsoft 365

2024-03-29
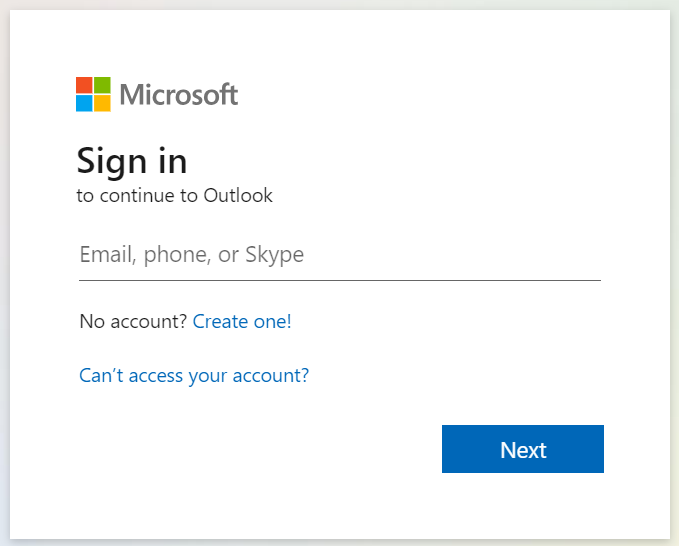
Step 1: Sign in to your Microsoft 365 Defender portal.
Step 2: Click on "Policies & rules" in the left-hand menu
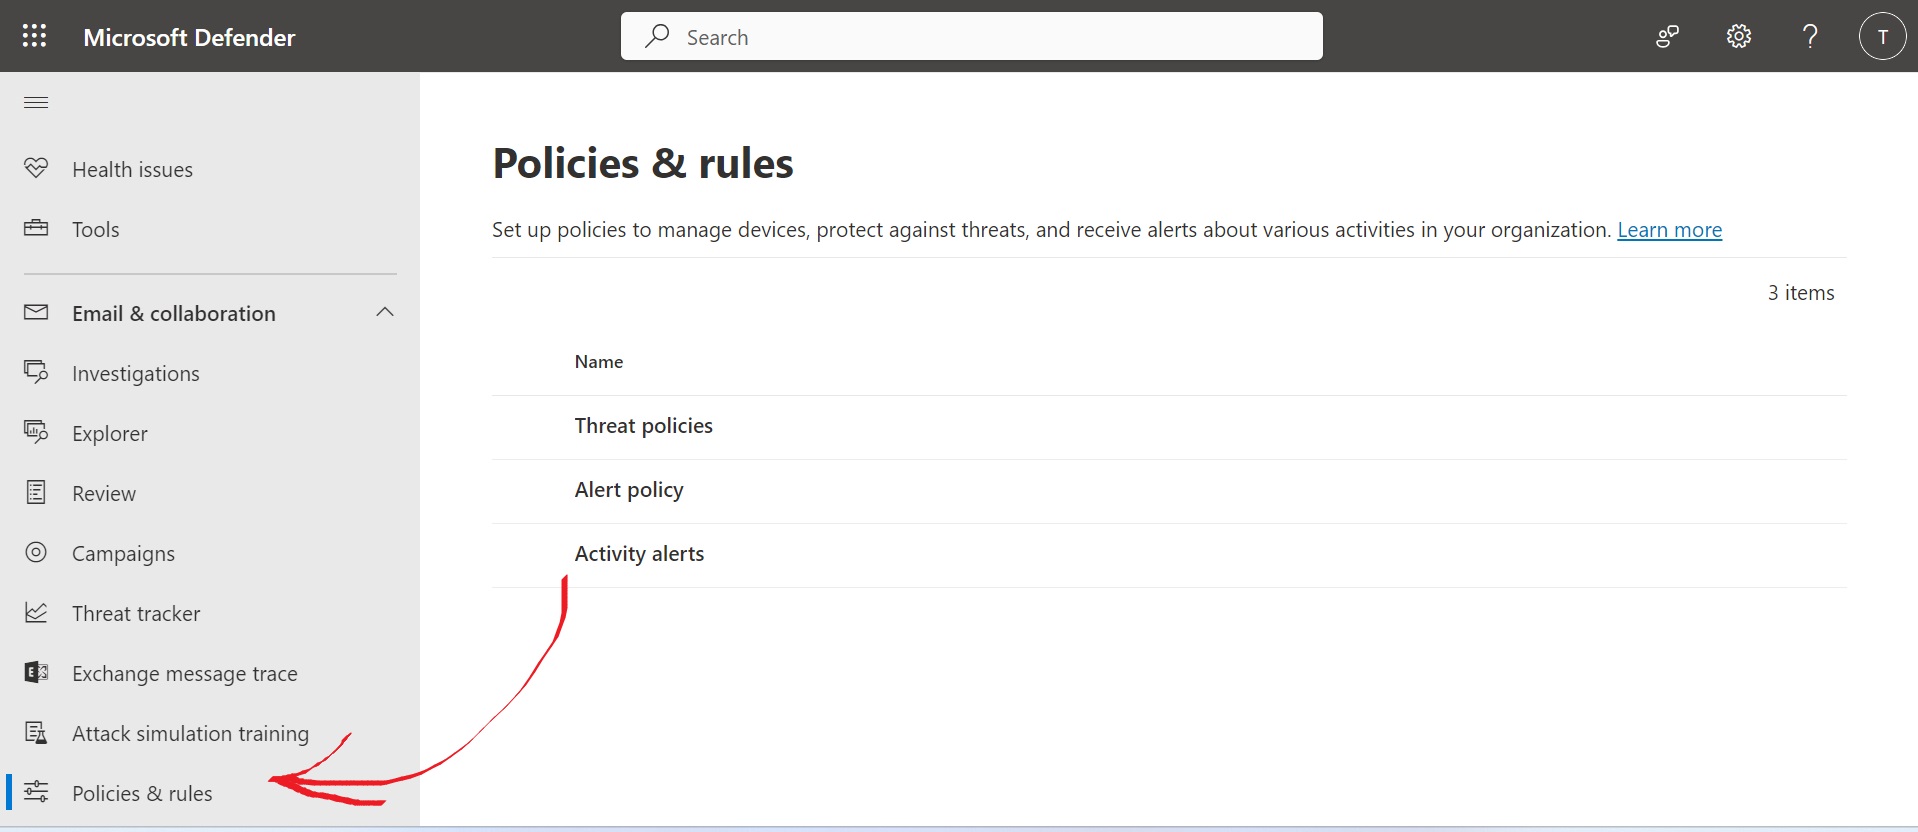
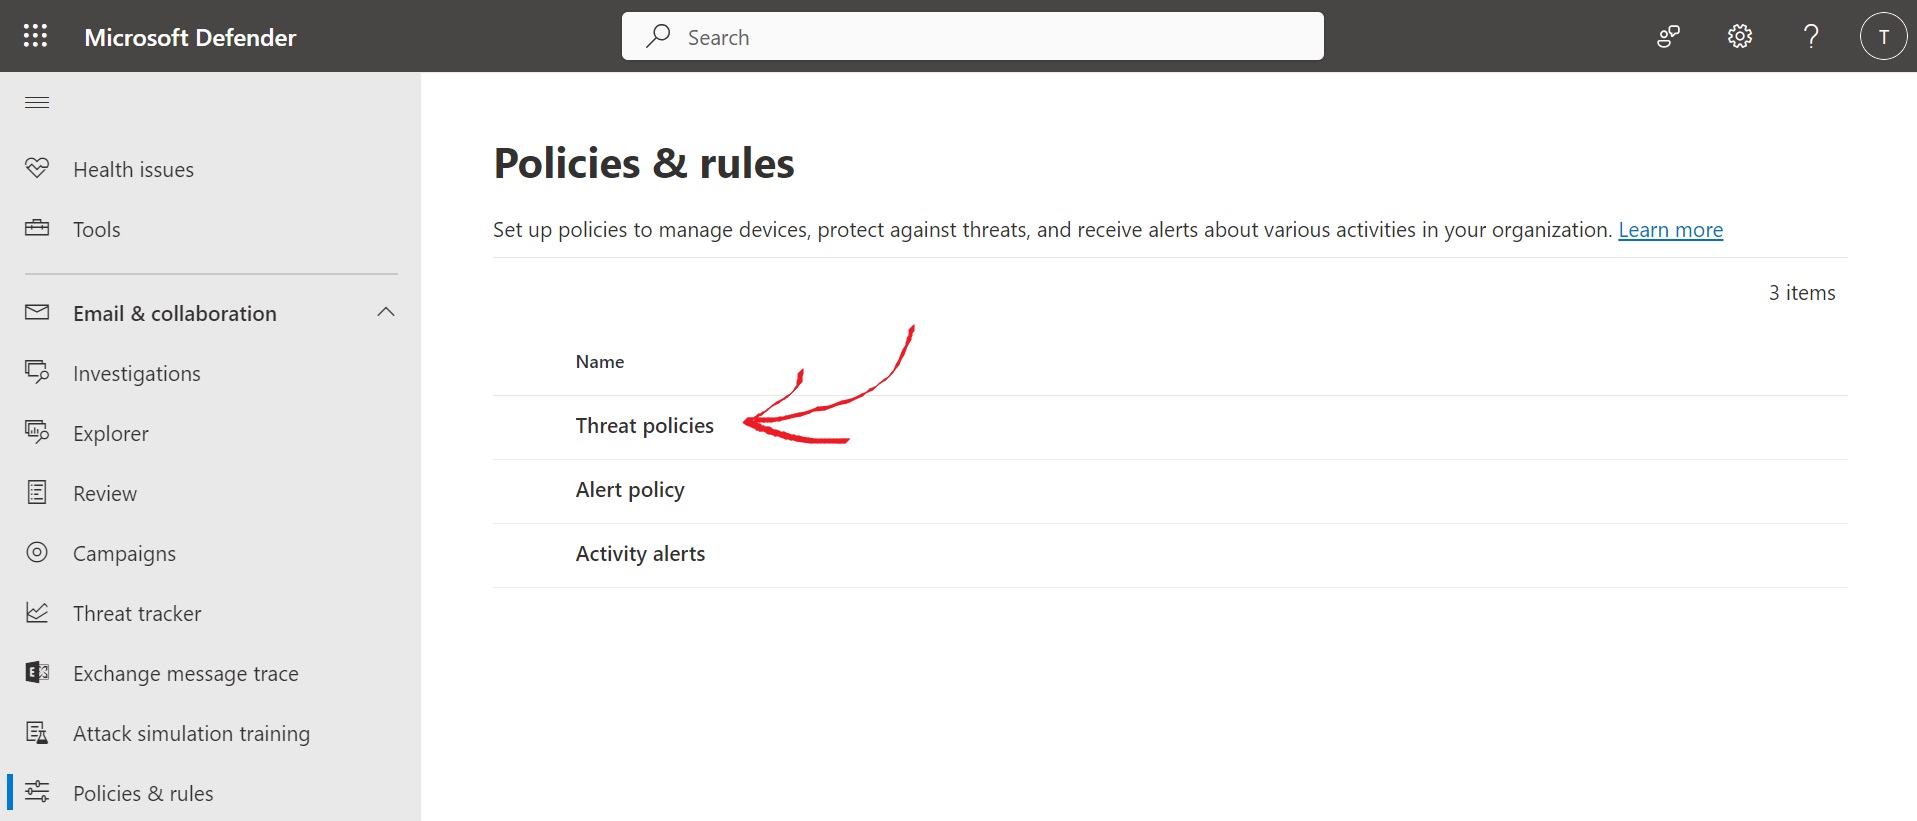
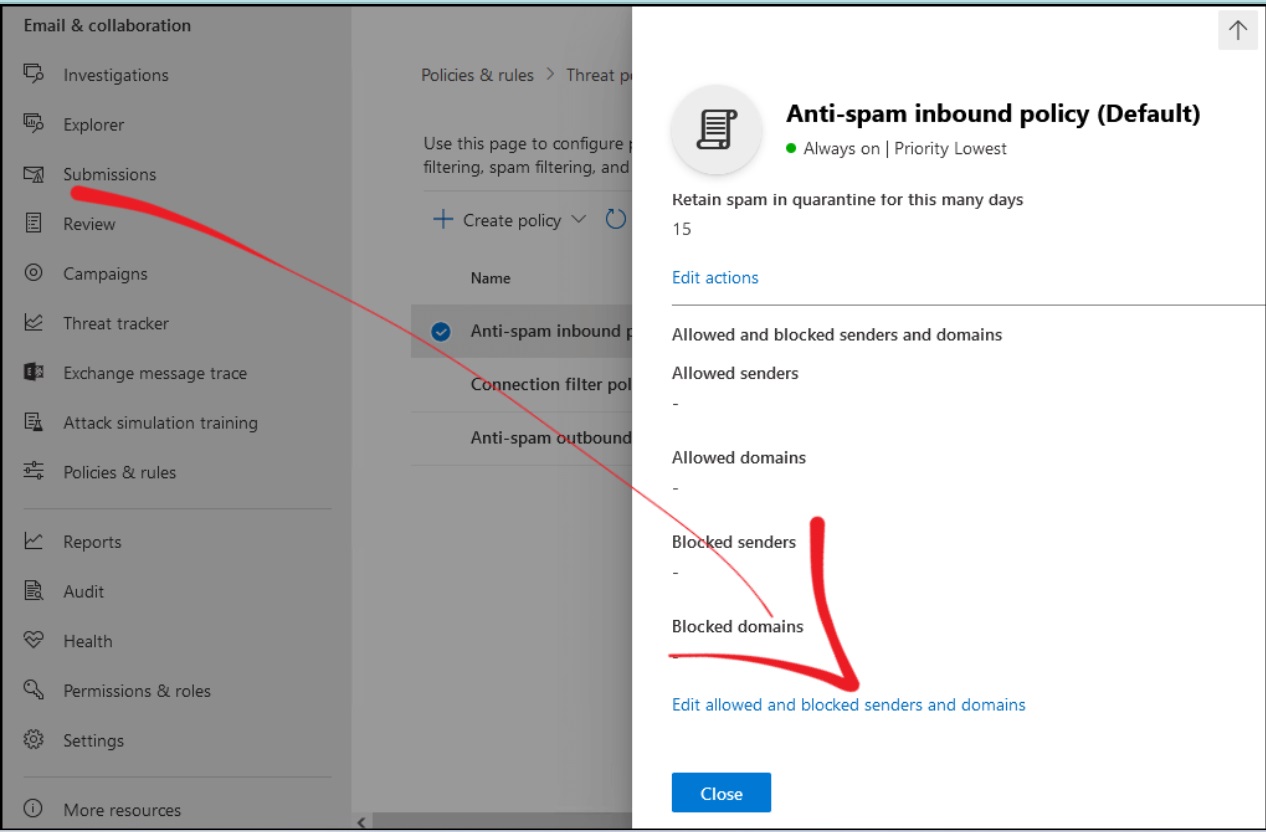
Step 3: Select Threat policies
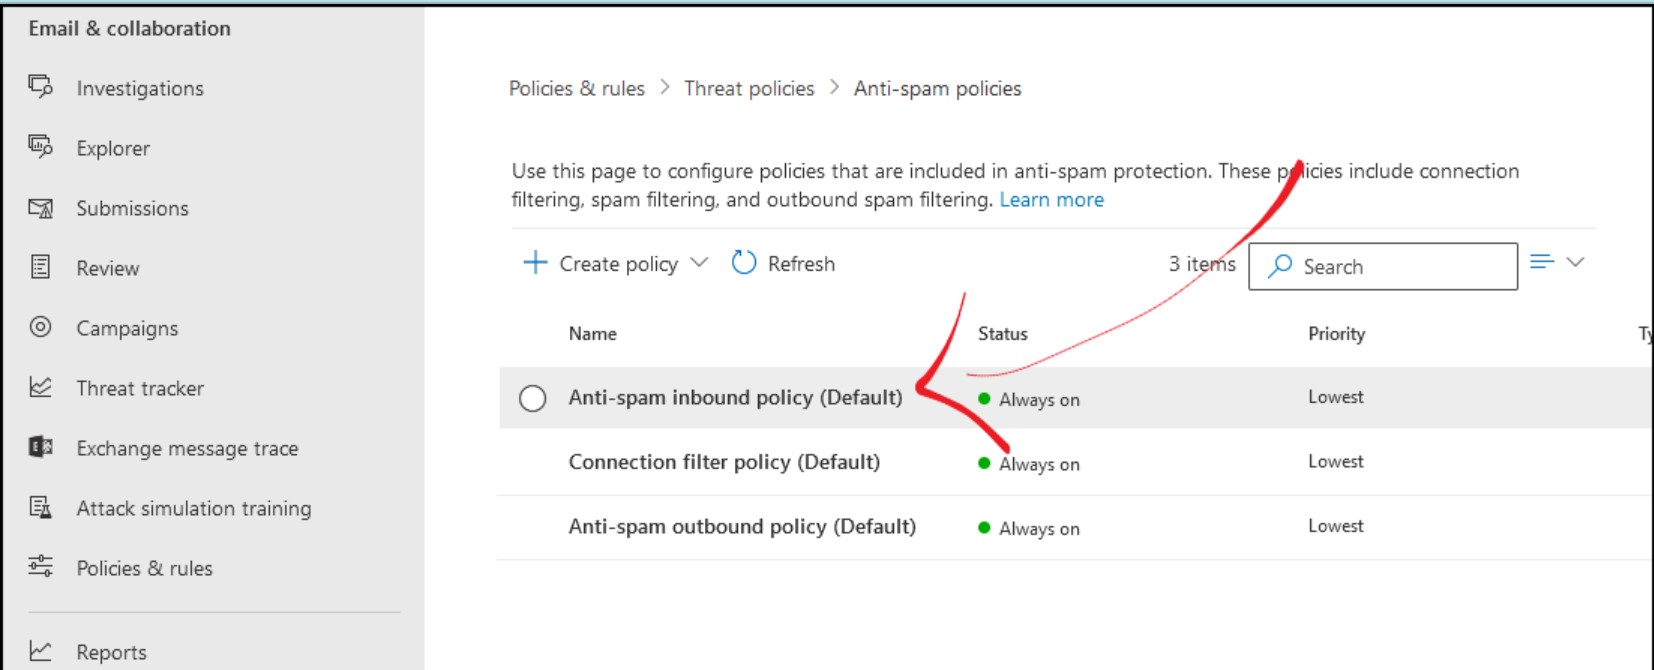
Step 4: Select Anti-spam inbound policy (Default)
Step 5: Scroll down and click on Edit allowed and blocked senders and domains.
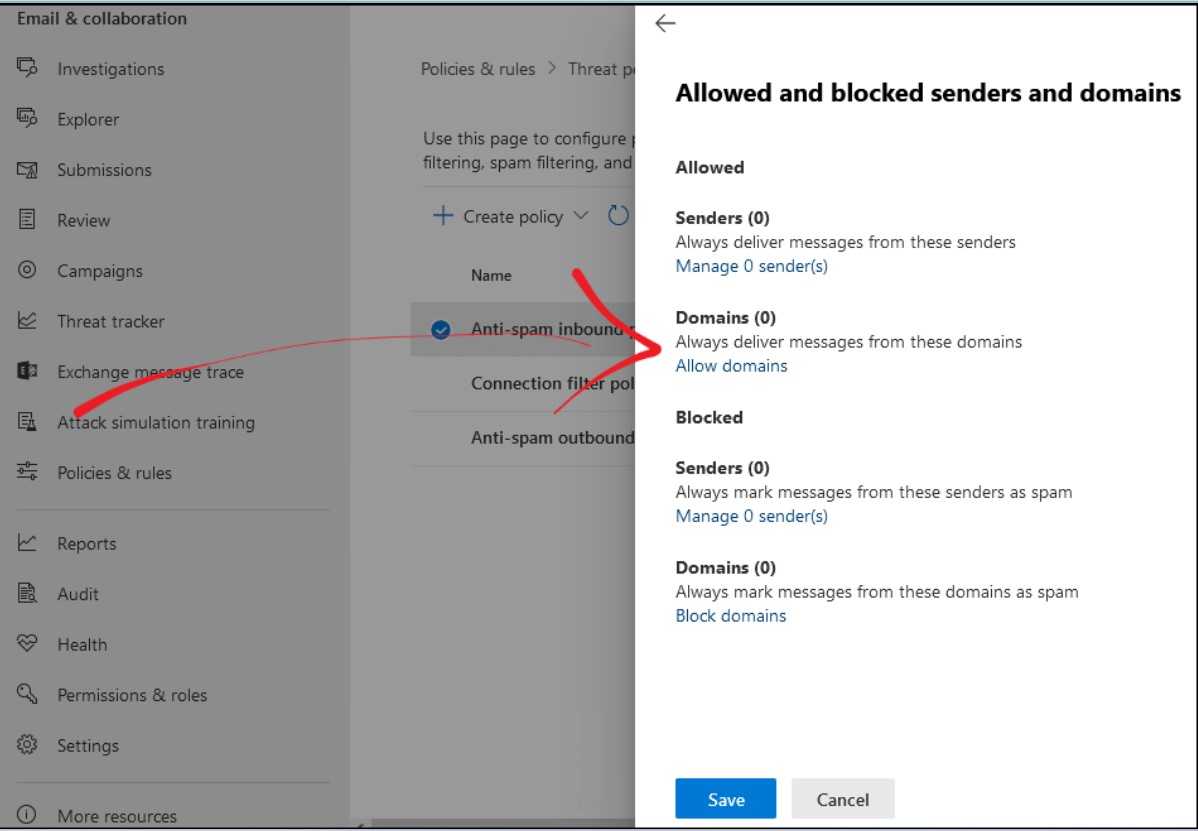
Step 6: Click on Allow domains.
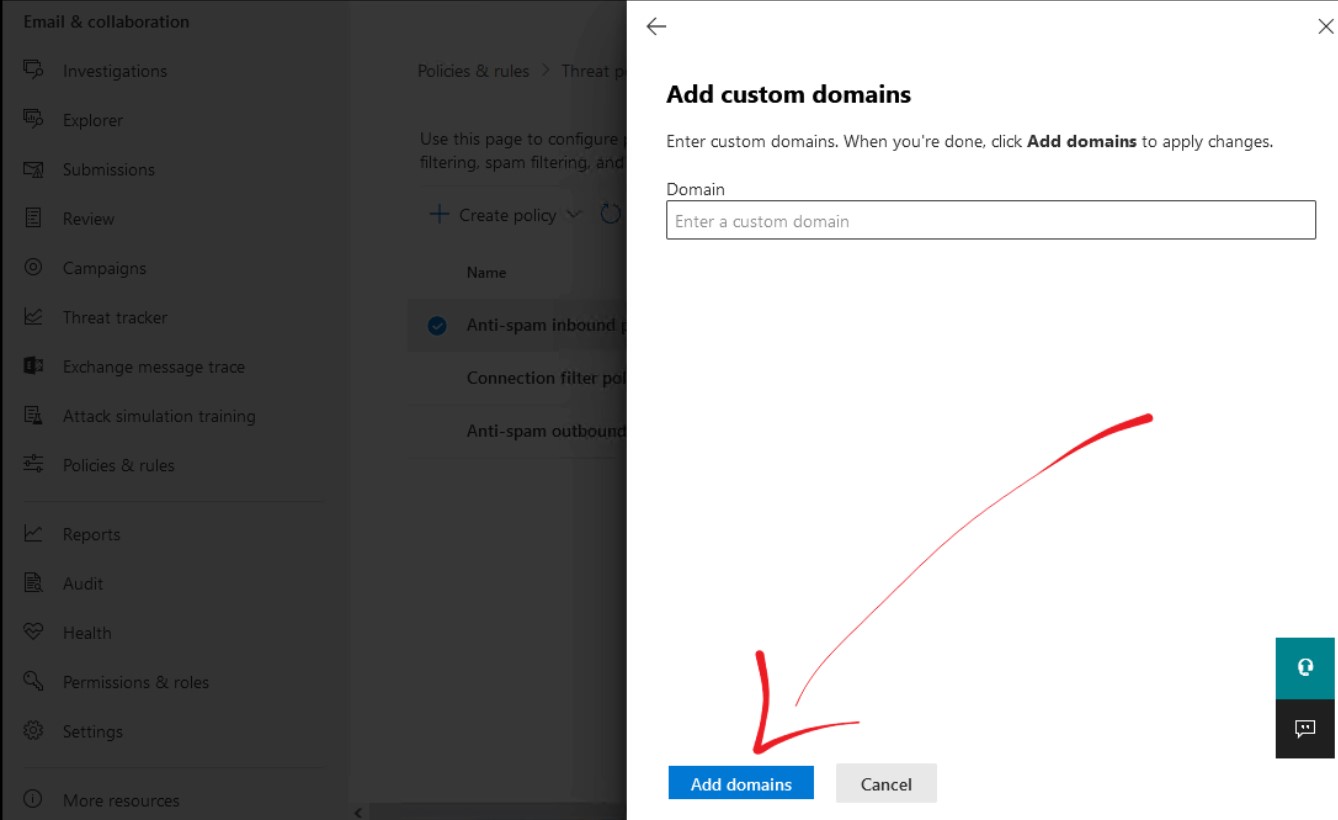
Step 7: Add the domain that you want to allow (whitelist).

Step 8: Click Add domains.
Step 9: Click on Save.
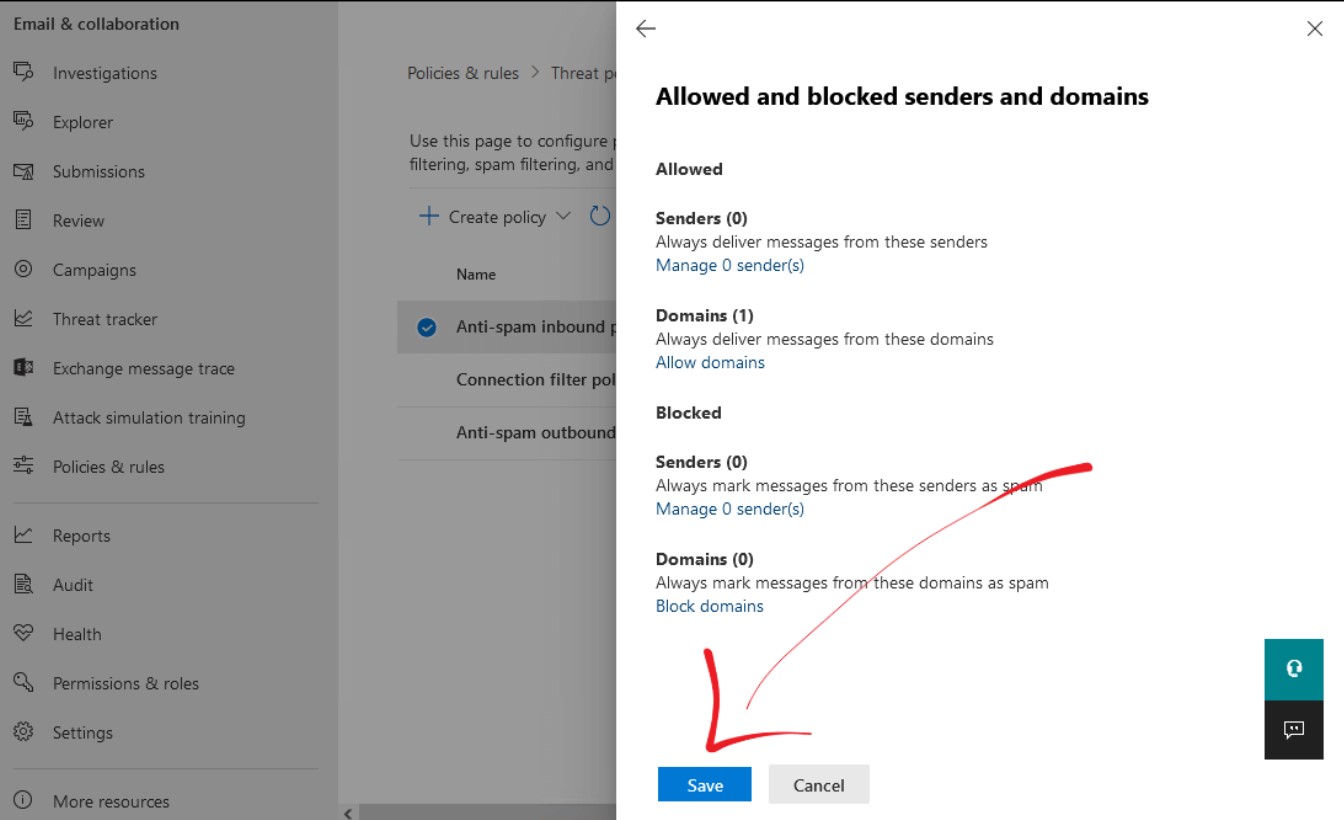
That's it. You've successfully added the Domain as a trusted Domain. From now on, all emails sent via this particular Domain will not be marked as spam.